(Psst: The FTC desires me to remind you that this web site accommodates affiliate hyperlinks. Meaning if you happen to make a purchase order from a hyperlink you click on on, I would obtain a small fee. This doesn’t enhance the value you may pay for that merchandise nor does it lower the awesomeness of the merchandise. ~ Daisy)
Paracord can be utilized to create a ton of various initiatives and practical equipment. A paracord bracelet is likely one of the best and quickest initiatives to make, however relying on the design you employ, it doesn’t all the time present an entire lot of cordage. I need to share with you a practical mission that I take pleasure in making that may present extra cordage than a easy bracelet does: the paracord lanyard.
The lanyard I shall be making isn’t the sort that workplace employees put on to show their employment badges. It’s extra of a lanyard {that a} hunter makes use of to carry duck calls or different kinds of wild recreation calls. I like any such lanyard as a result of you possibly can dangle virtually something from it that you really want fast entry to.
What You Will Want
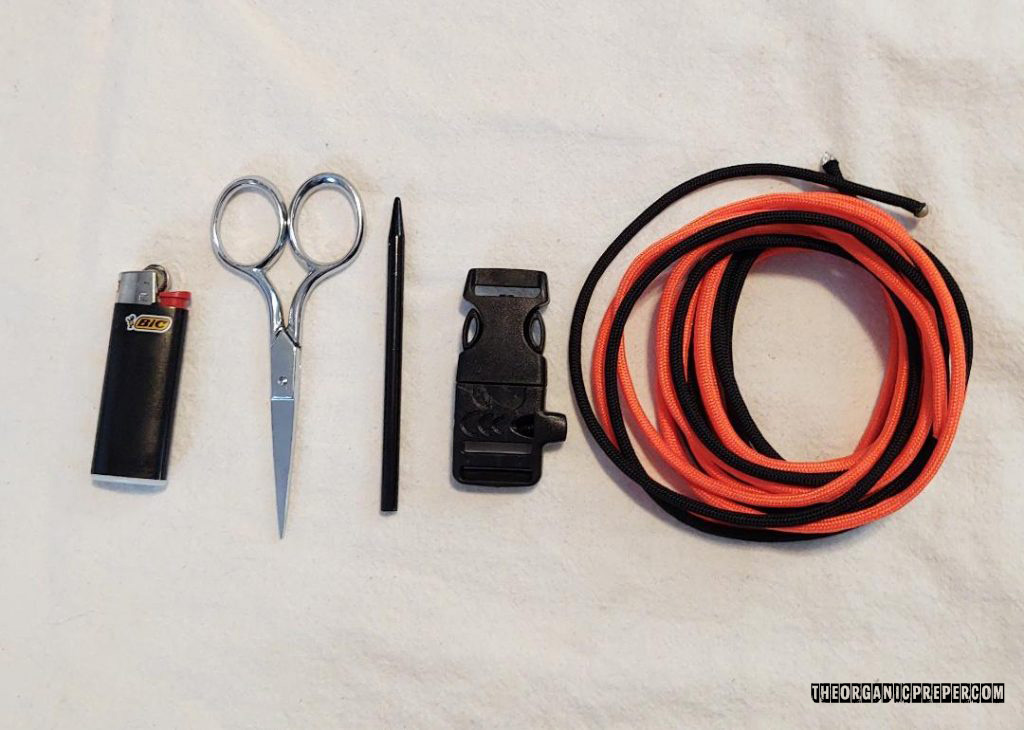
- 2 items of paracord which might be 10 ft every in size (for a complete of 20 ft). This may produce a lanyard that’s 36 inches lengthy. Personalize the lanyard by utilizing any coloration you need.
- 1 plastic buckle or break-away clasp
- 1 lighter
- Scissors
- Paracord lacing needle (or any pointed merchandise like a nail or knitting needle)
Making the lanyard
I shall be utilizing one strand of paracord that’s black and one orange strand. You should utilize any colours you need, however I’m utilizing these in order that will probably be simpler to observe the illustrations.
Additionally, the primary physique of the lanyard requires 20 ft of paracord to provide a completed lanyard that’s 36 inches lengthy. This doesn’t embody including loops for hanging gadgets, so you’ll want to have additional cordage of the identical coloration in order that loops may be added on the finish. It’s all the time higher to make use of extra twine than you assume you have to.
Step 1.
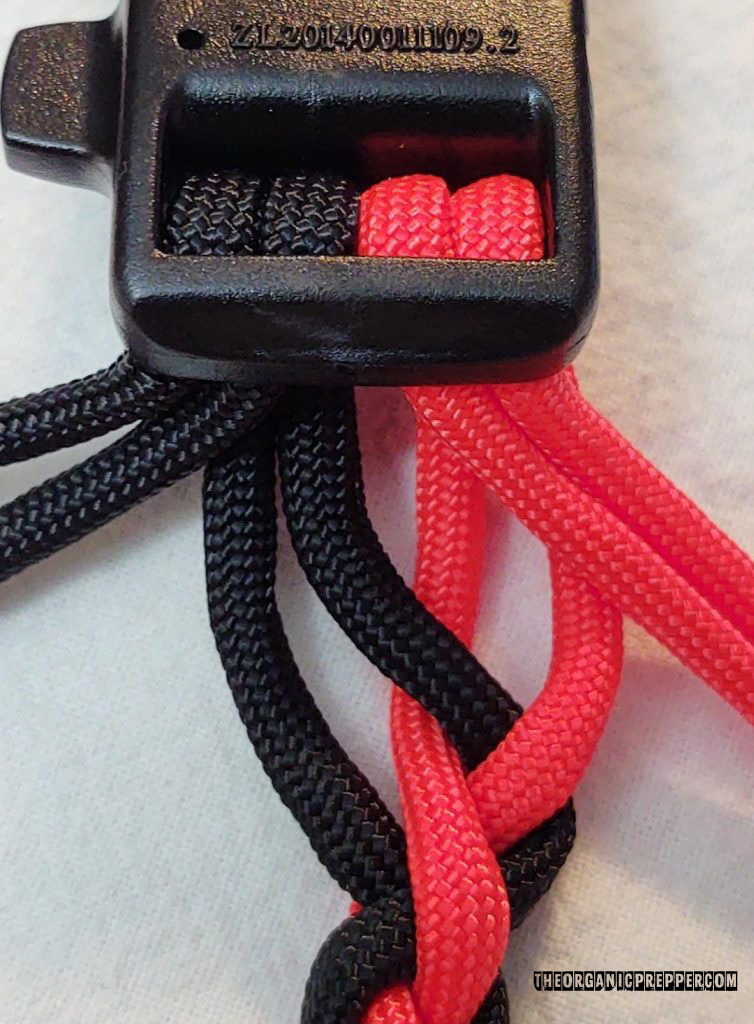
Thread one finish of every paracord strand via the plastic buckle.
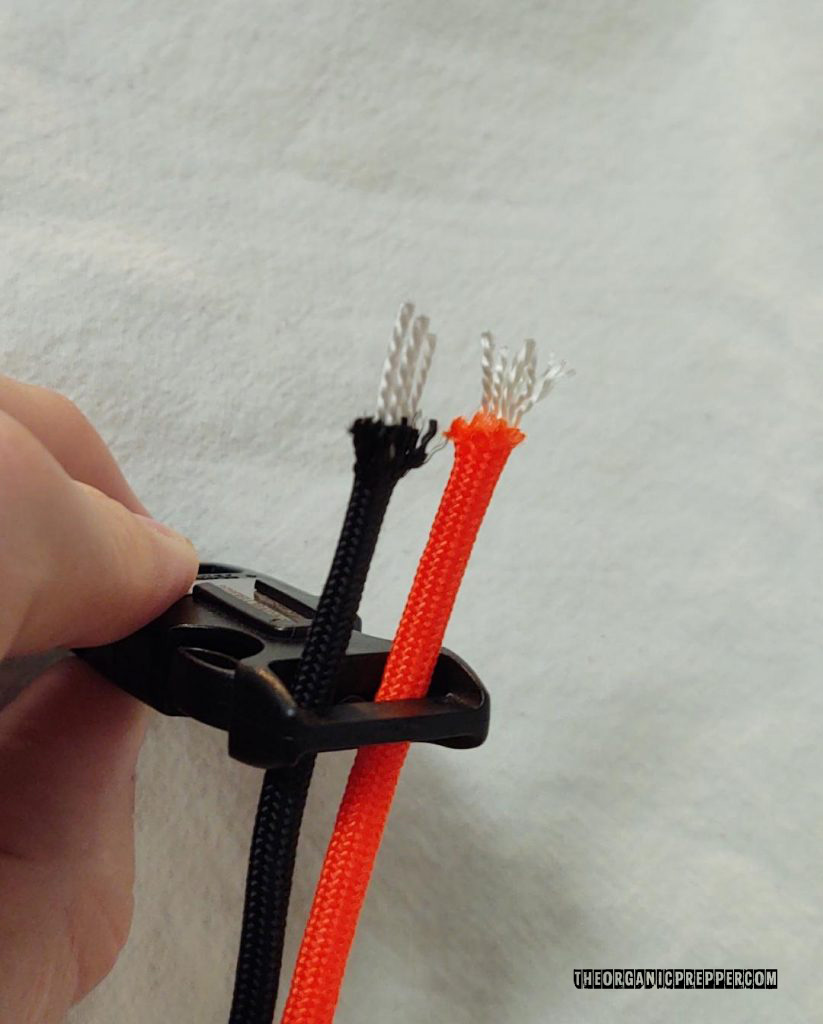
Step 2.
Pull the ends via the buckle and match them up with the other ends of the strands. This may fold the paracord in half in order that the midpoint of the strands is on the tip of the plastic buckle.
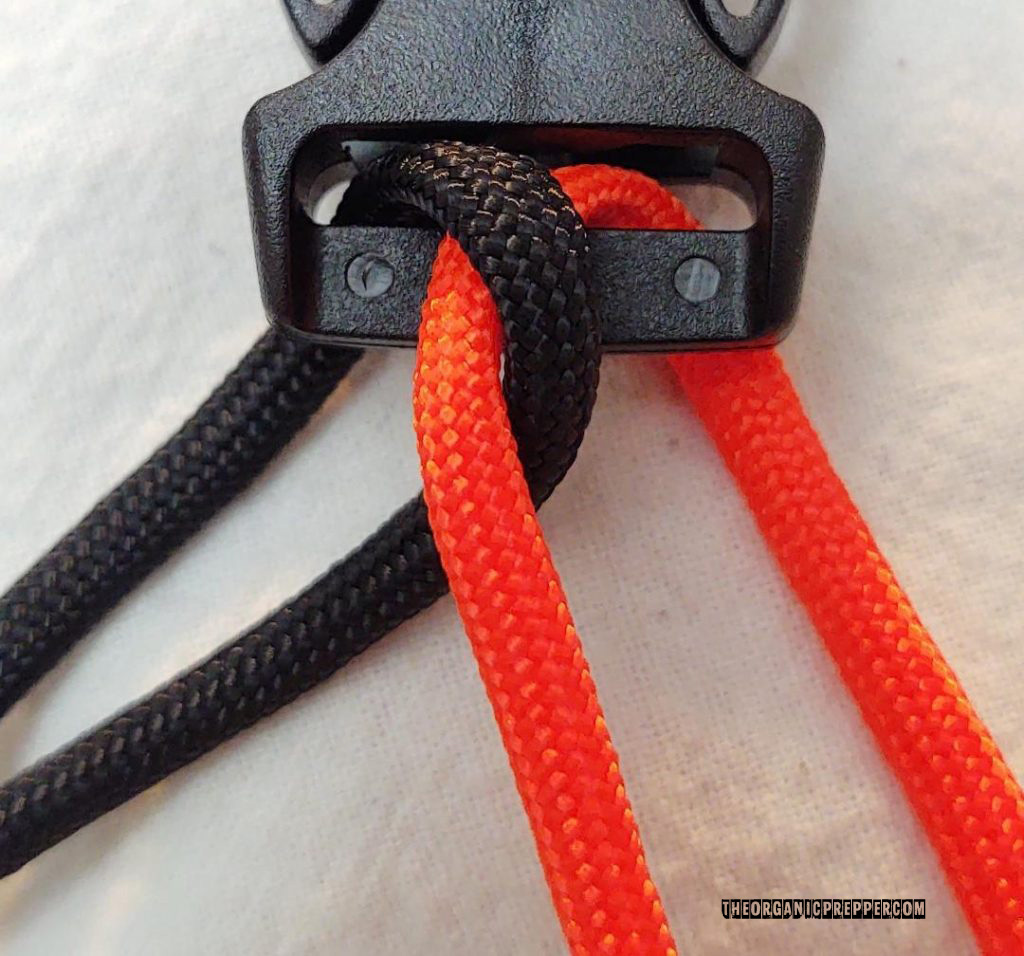
Step 3.
Thread the fitting black strand over and behind the black and orange strand, and pull the strands to the aspect in order that it seems like the image.
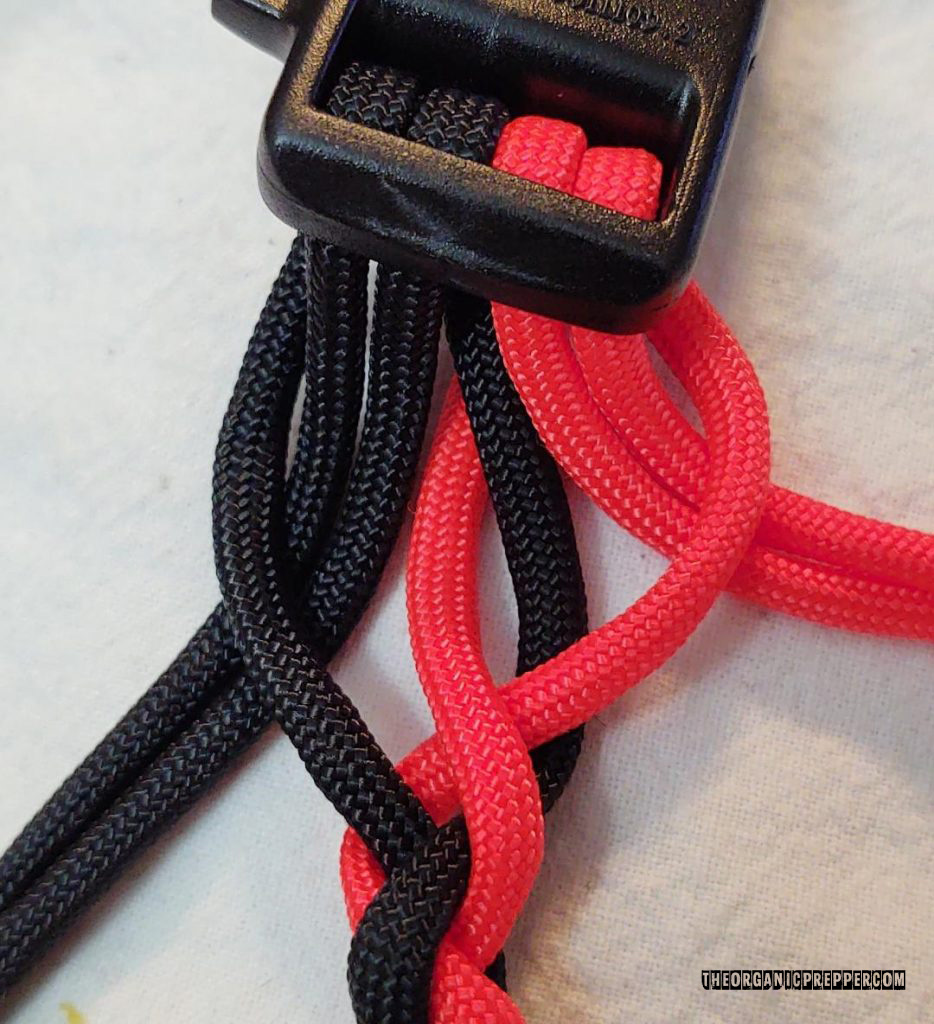
Step 4.
Deliver the highest left black strand behind the left orange strand and up via the center of the opposite three strands.
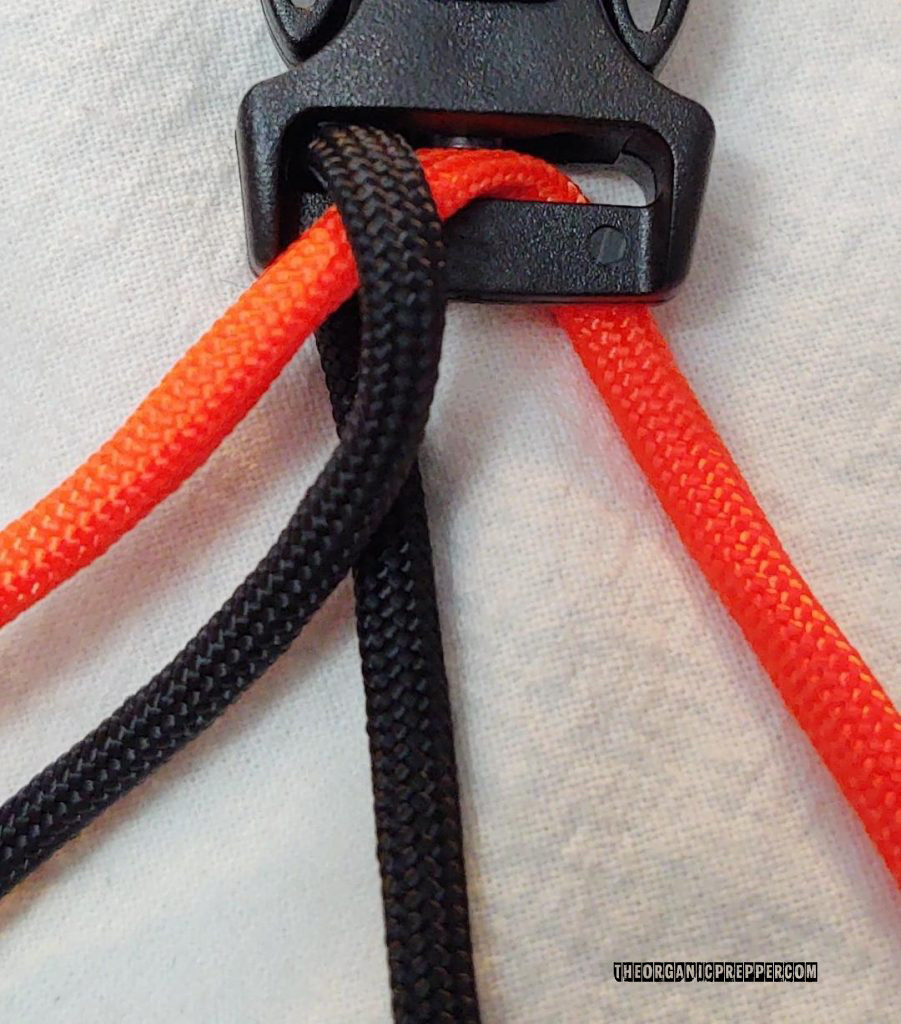
Step 5.
Deliver the earlier black strand up between the orange strands and to the left.
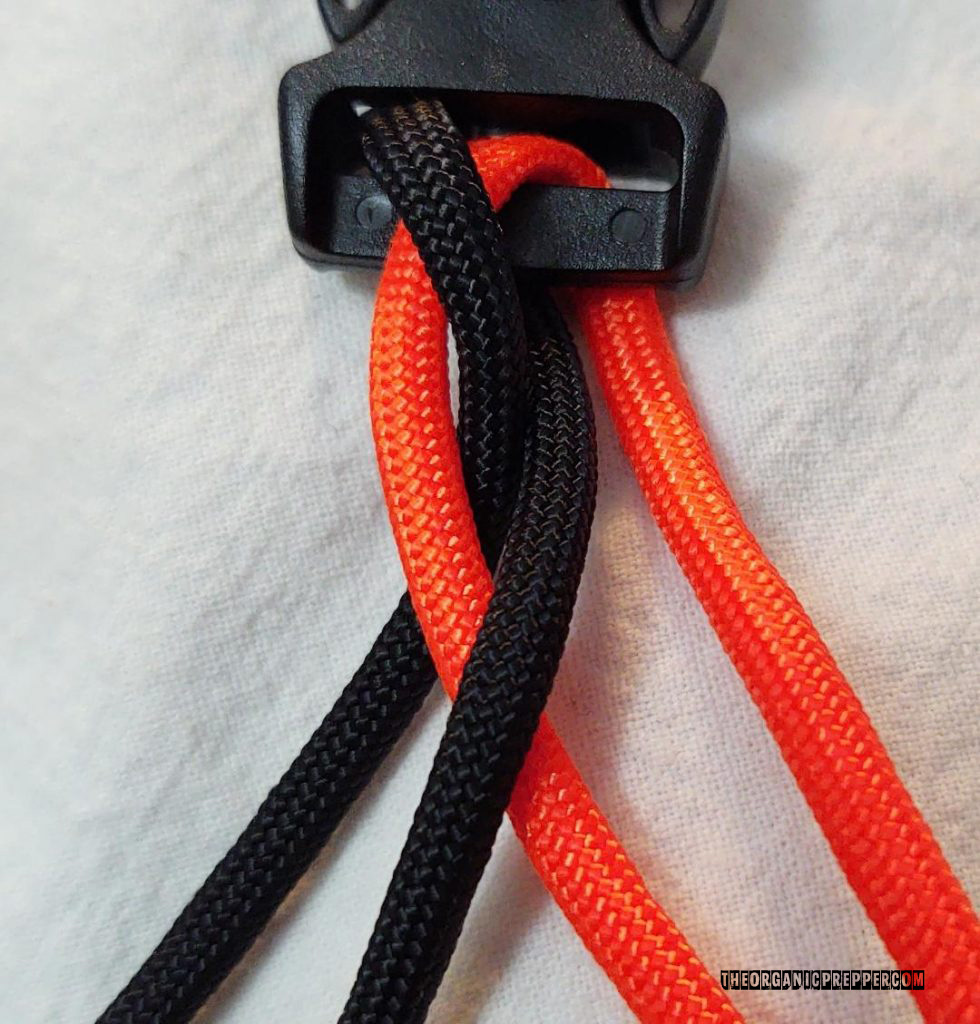
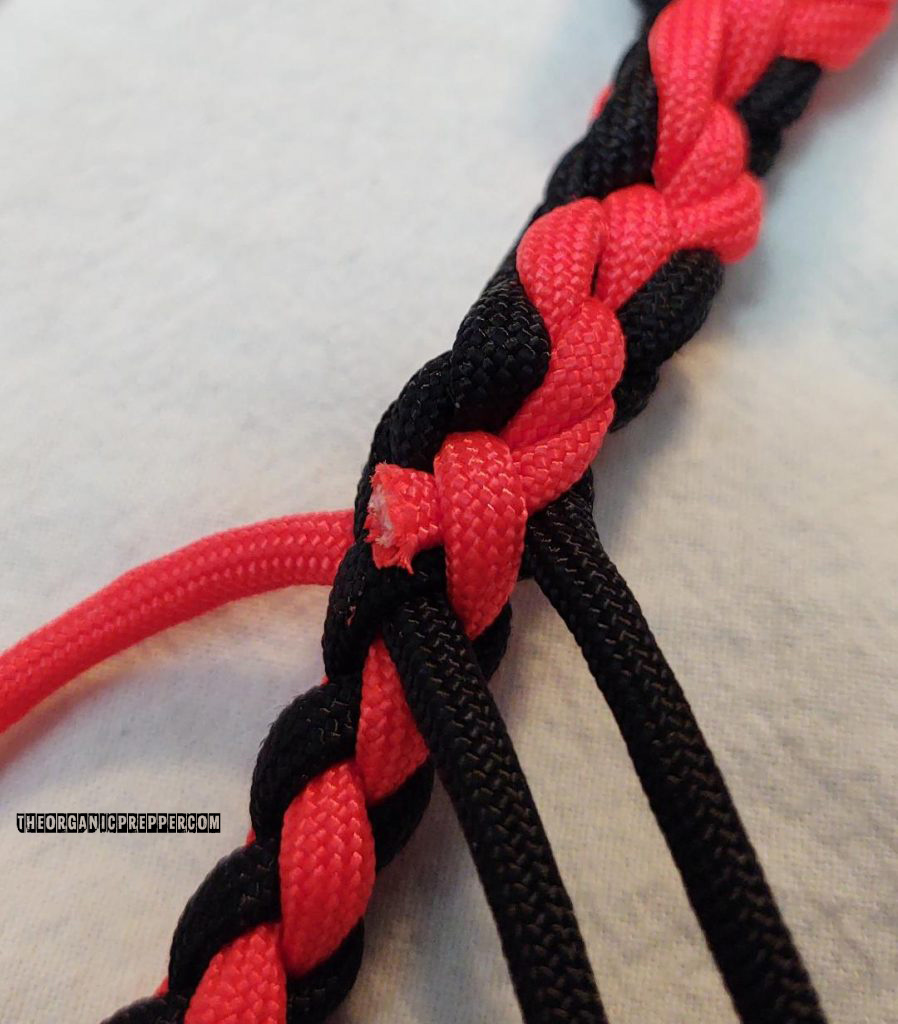
Step 6.
The above three steps are repeated with the orange strands on the fitting. Deliver the highest proper orange strand down, behind, and up via the center between the opposite three strands and pull it to the fitting.
When you’re finished pulling a strand up, via the center, and off to the aspect, the 2 strands of the identical coloration must be on that aspect. Pull the stands taut after every go.
I began with black on the left and orange on the fitting, so after one completed step of weaving, the 2 black strands must be on the left, and the 2 orange strands must be on the fitting.
(For those who like this type of high-quality content material The Natural Prepper supplies, ensure you take a look at our free QUICKSTART Information to canning as nicely.)
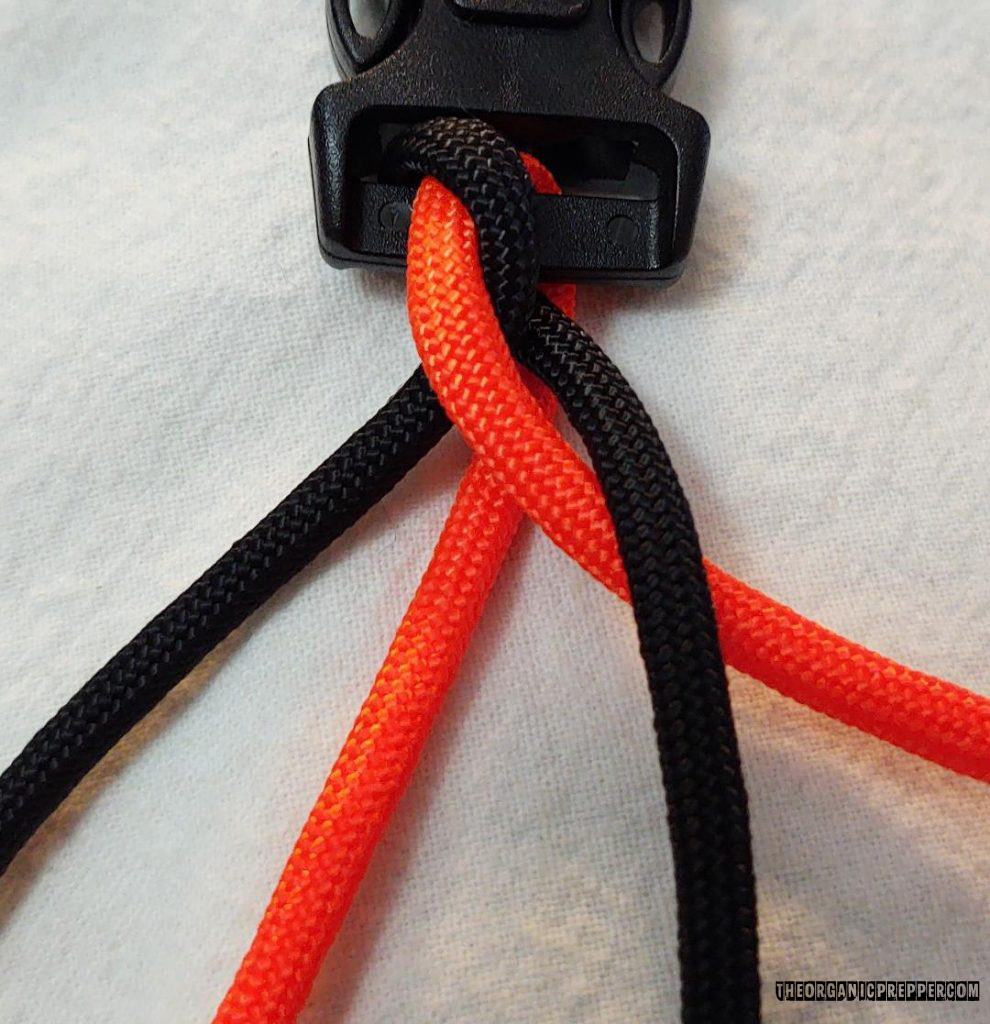
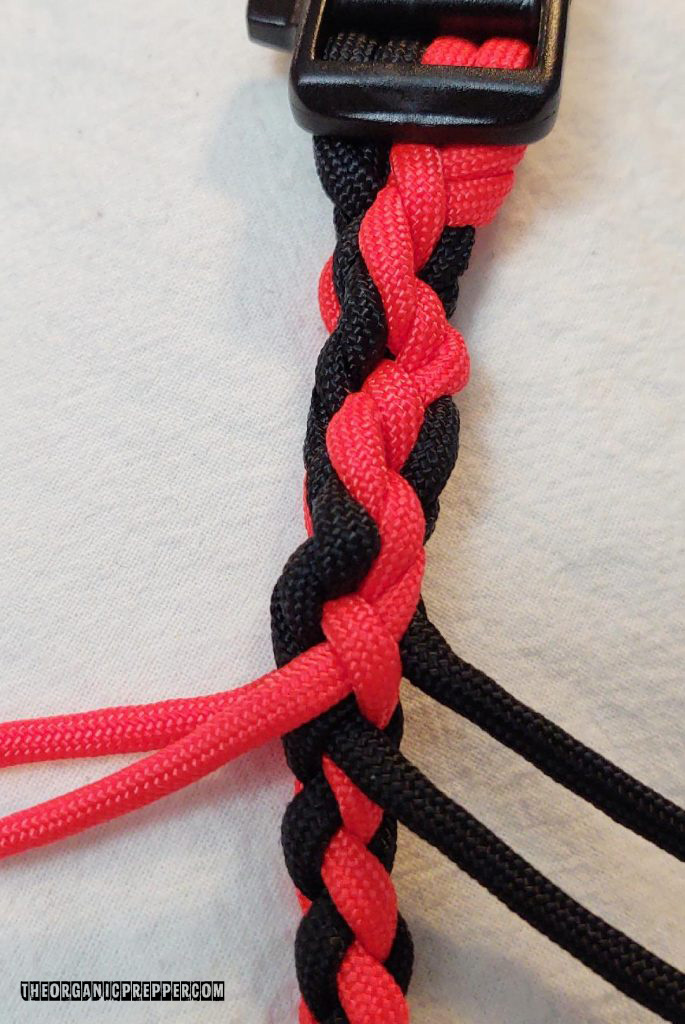
Step 7.
After repeating the above steps a number of occasions, the lanyard ought to start to seem like the image. Repeat the braiding course of till it reaches 36 inches lengthy, or the size you need.
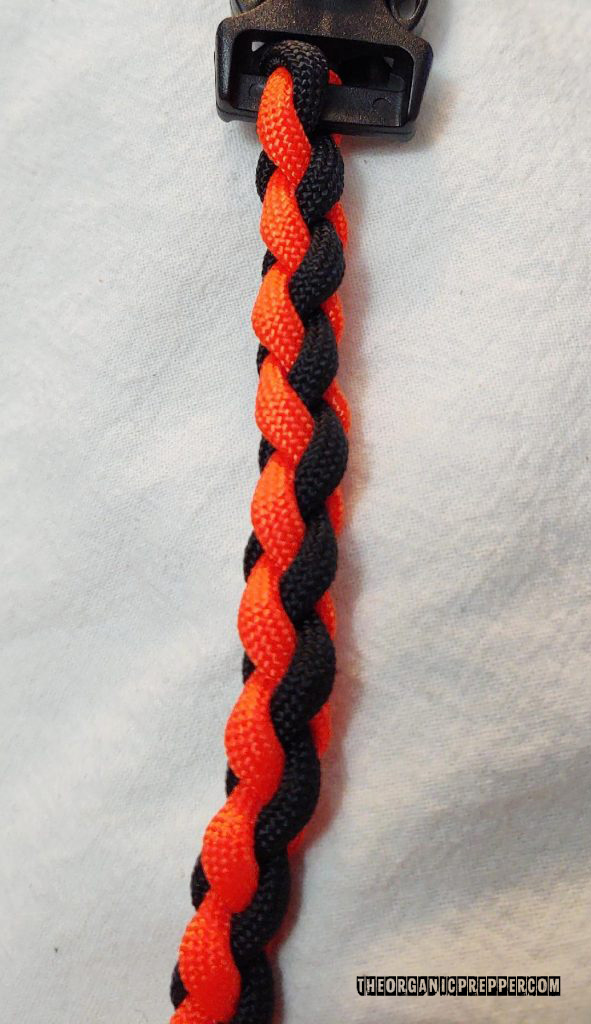
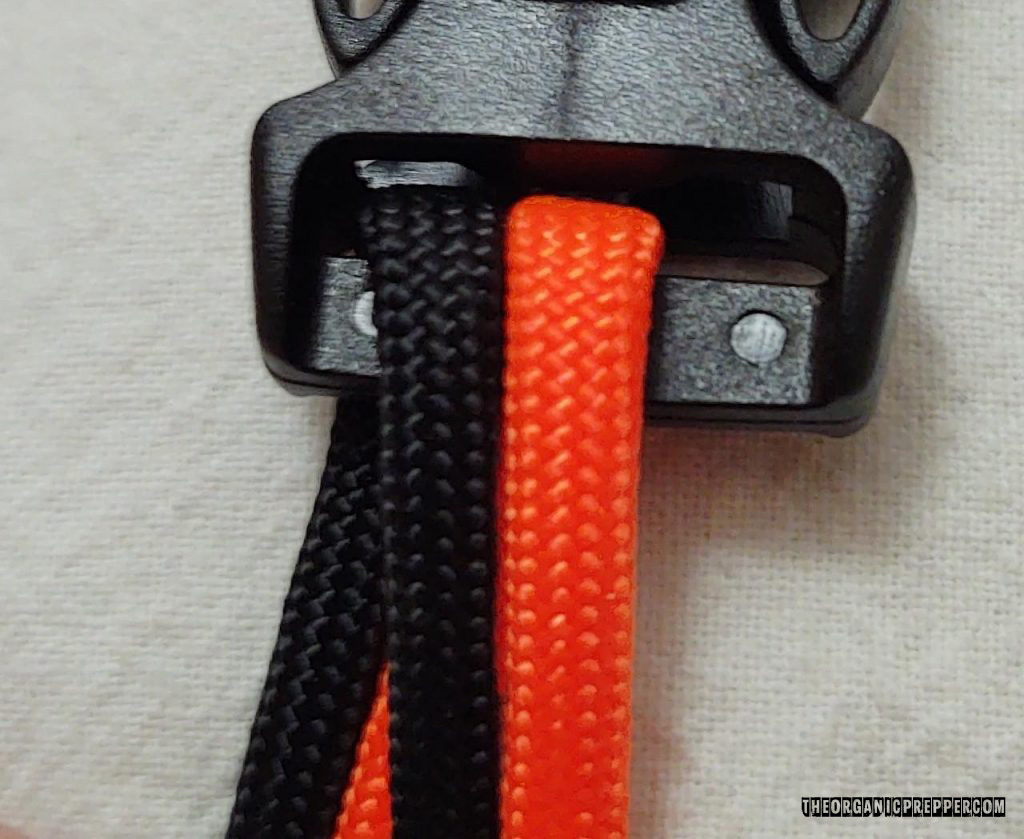
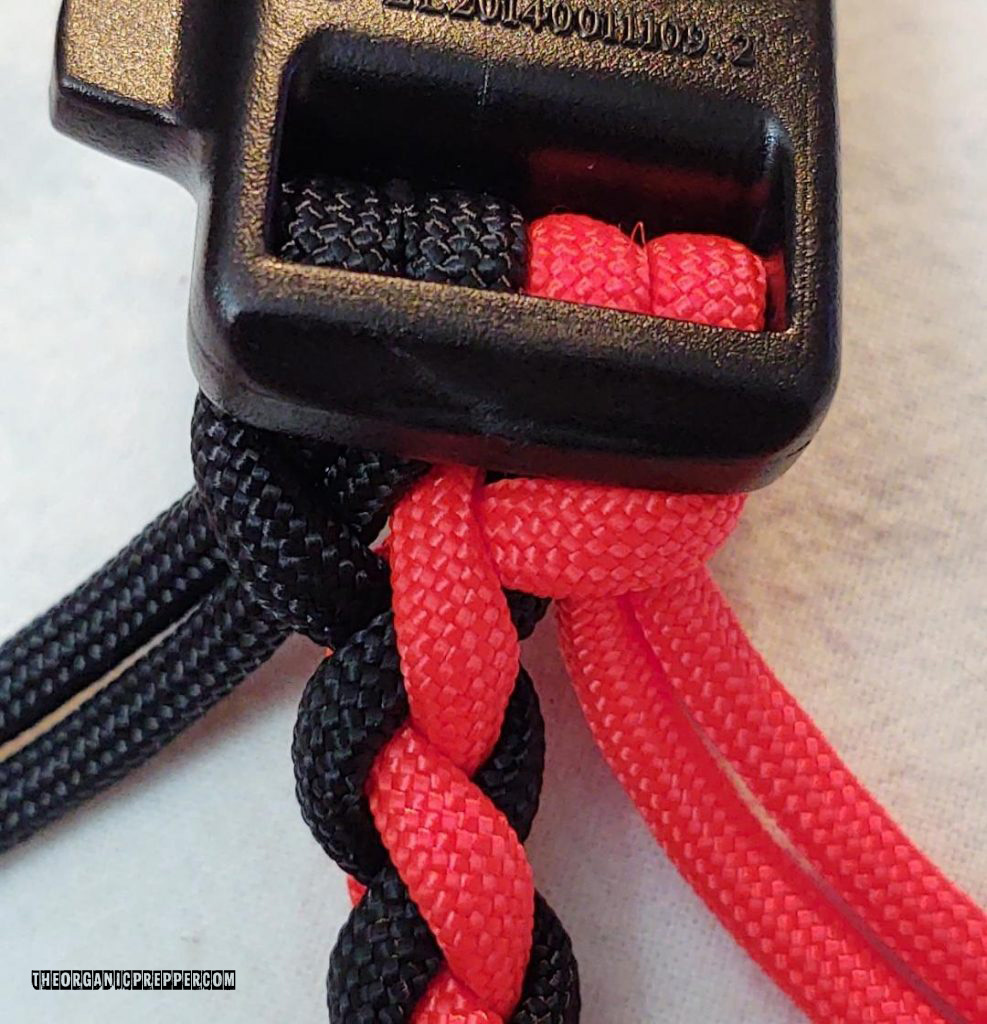
Step 8.
When you attain the specified size, pull all 4 lower ends of the paracord via the other finish of the plastic buckle, however depart some slack between the tip of the braids and the plastic buckle. Maintain like colours to 1 aspect (black is on the left and orange is on the fitting)
Step 9.
Move the lower ends of the paracord via the openings between the plastic buckle and the tip of the braid. Once more, holding like colours collectively (black ends ought to go between the black opening, and the orange ends ought to go between the orange opening)
Step 10.
Now tighten the whole lot up by transferring the tip of the braid near the tip of the plastic buckle and pulling on the tip of the black strands after which the orange strands.
Step 11.
Connect a paracord lacing needle to one of many black paracord ends and insert the needle beneath the primary black arch of the braid. Pull the needle and the black twine via however don’t over tighten.
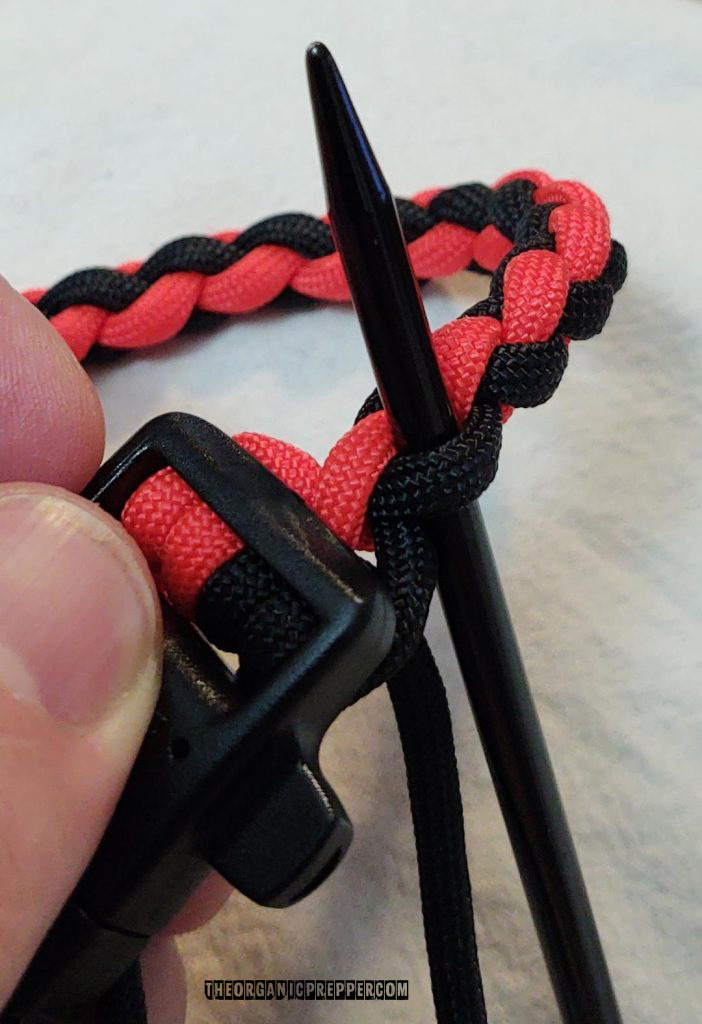
Step 12.
Insert the needle in the other way of the following black arch and pull the twine via. Repeat this course of 5 occasions.
When you’re finished, take away the needle and fix it to the opposite black twine and repeat the above steps with the black arches on the other aspect of the braids.
When you’re finished, take away the necessity and repeat the above steps with the 2 remaining orange strands beneath the orange arches.
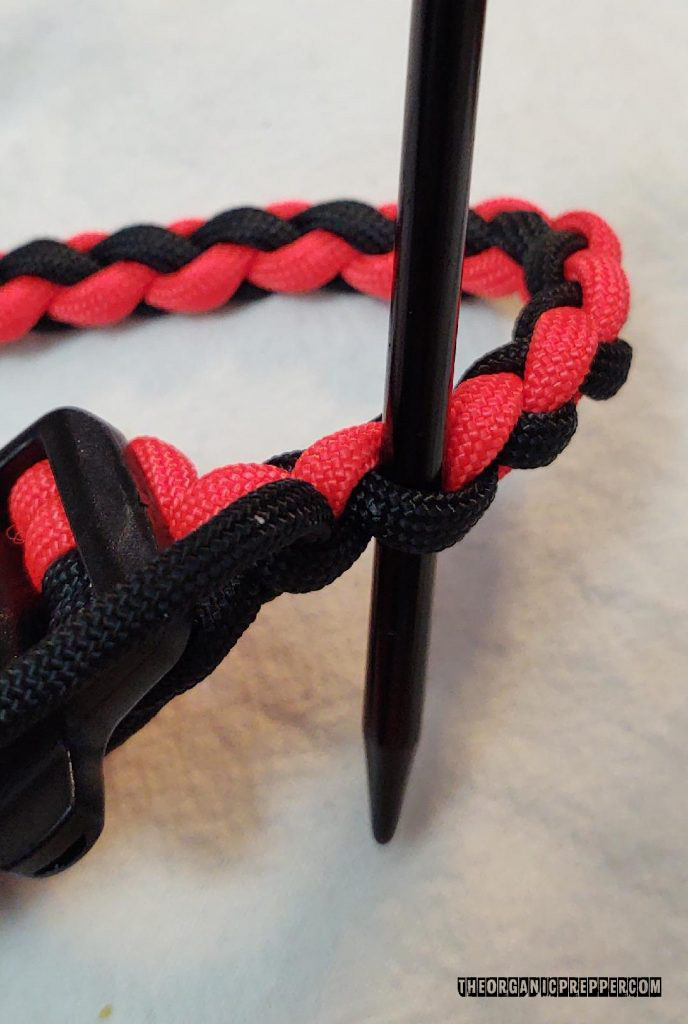
Step 13.
After you’ve got laced the strands again via the physique of the lanyard, it ought to seem like the image.
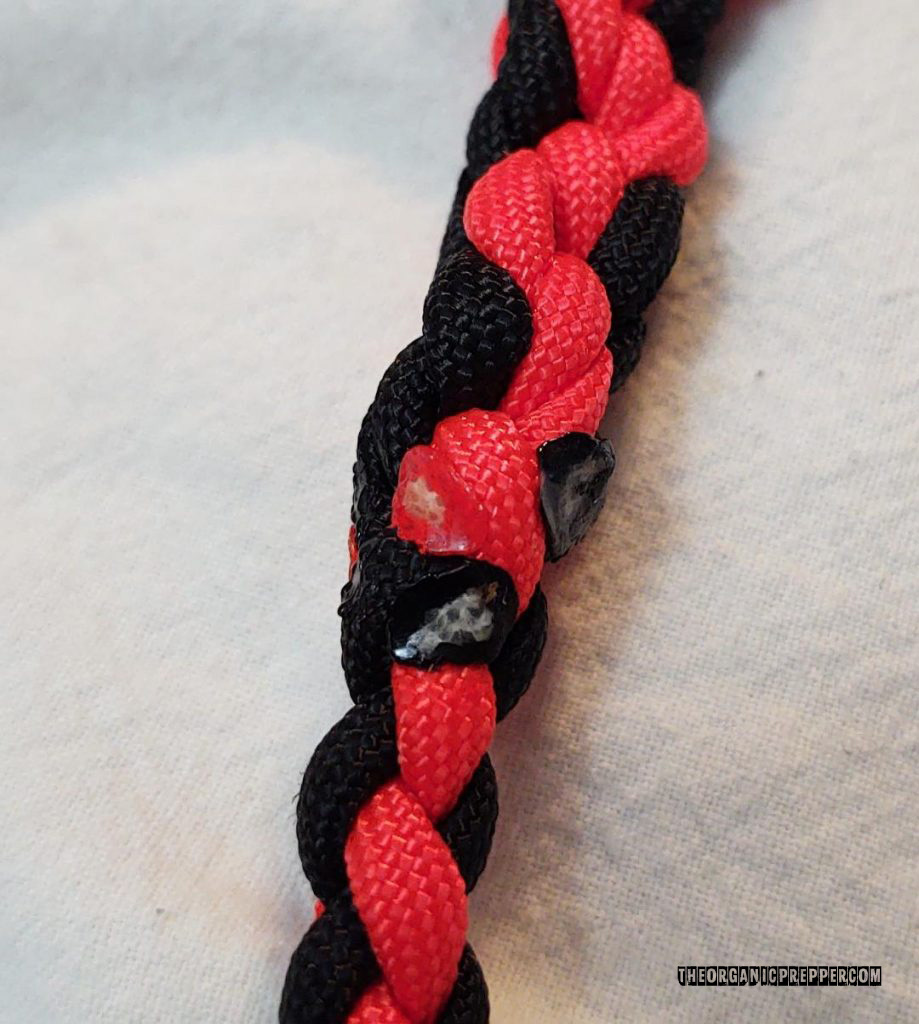
Step 14.
Take your scissors and lower one strand near the braid. Use a lighter to softly soften the tip of the paracord. When you possibly can see a small glob of melted materials, flip the lighter off and use the aspect of the lighter to press the melted materials into the braid. Repeat this step three extra occasions for the remaining strands.
Step 15.
The melted strands will seem like this.
Step 16.
The principle physique of the lanyard is finished, and all that’s left is so as to add some loops for hanging gadgets. There are numerous alternative ways for doing this, and the knots that you simply use will rely upon what you need to dangle. It is usually as much as you the place on the lanyard you need to put the hanging factors.
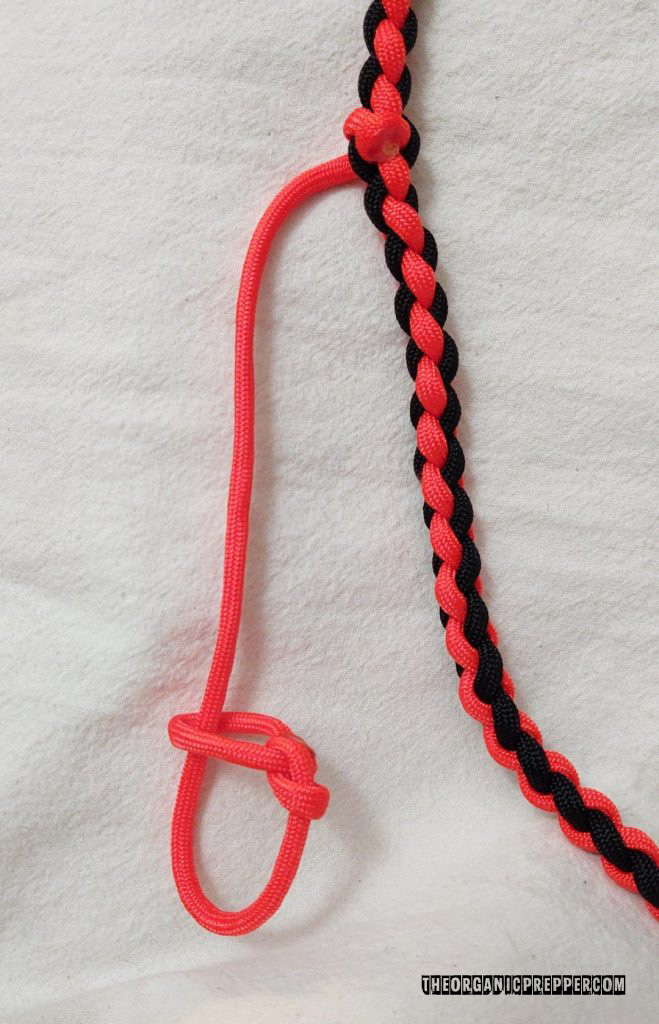
For the aim of this tutorial, I made these factors easy.
I used the lacing needle to insert one finish of paracord via the braid, tied a easy overhand knot, lower the tip near the knot, and burned it.
On the other finish of this twine, I tied a small operating bowline. This enables me to have an adjustable loop the place gadgets may be hung.
Last ideas on paracord lanyards…
I’ve made this precise kind of lanyard for holding recreation calls, however I’ve additionally used them to carry different outside instruments or survival gear.
An important factor to recollect when making a paracord lanyard is {that a} plastic buckle or break-away clasp must be used. Kind III paracord has a breaking level of 550 kilos, so it may be harmful having such a powerful piece of cordage hanging round your neck.
Thanks for studying, and I hope you loved the mission. In case you are on the lookout for extra paracord initiatives, or if you happen to’re serious about how paracord can be utilized within the outdoor, take a look at my e-book Paracord Initiatives For Tenting and Outside Survival.
Have you ever ever made a paracord lanyard or what have you ever used paracord to make? Tell us your experiences and ideas by leaving a remark under.
About Bryan Lynch
Bryan Lynch is the creator of two books, Swiss Military Knife Tenting And Outside Survival Information, and Paracord Initiatives For Tenting And Outside Survival. He has additionally written tons of of articles about prepping, emergency preparedness, self-reliance, and kit evaluations. By way of his writing, his hope to assist educate folks and get them serious about these subjects in order that they’re higher ready for an emergency.